The problem with a lot of the content around A/B testing on the web is that it only covers landing pages and e-commerce websites. I want to be able to run A/B tests on the words inside my product experience.
The difference here is that users have to log in to my product. Let’s say my product is a web-based SaaS application. The tools that test landing pages are called client-side tools. Google Optimize, VWO and Optimizely are the most popular. These tools work by placing a cookie in your browser to identify you. This way if you come back to the site again, the site remembers who you are and shows you the same version on the site you saw the first time.
Client-Side v Server-Side A/B Tests
Client-side testing doesn’t work for web apps that have user accounts. Someone might log in to their account from a different device, like their phone, or a different browser or a separate computer altogether (like the one they have at work vs home). This means that they could get two completely different versions of the same app. This is bad for the user and it also ruins your experiment.
The way to fix this is to run a server-side A/B test. Rather than using cookies in your browser, server-side testing tools keep a record of the users on your database and they keep track of which experiment a user is in at any point in time. When a user logs in, your server-side testing tool quickly checks to see what experiment a user is a part of and lets you know so that you can show them the correct version of the app.
Optimzely and VWO do have server-side testing features but they are only one the enterprise plan. Based on the last time I spoke to them, they cost at least 1K a month and you get locked in for the whole year.
This puts server-side experimentation out of the reach of most small projects. Luckily, there is another way to run server-side experiments and it’s based on using a feature flag. Technically, Optimizely and VWO are just providing a feature flag, but I’ll distinguish them because other feature flag tools are significantly cheaper. For example, Optimizely even has its own feature flag product called Rollout (and it’s free).
What Are Feature Flags?
The idea with a feature flag manager is to build the changes you want to test in your app under a true/false condition. Your feature flag manager keeps track of whether the condition is true or false for a given user. If the condition is true then they see the changes, if it’s false then they don’t.
I don’t want this post to become overly technical. If you’re the engineer that has to implement this, I’ve put together a 3-minute video that shows you how this works and how to integrate it into a real project. I have used Optimizely rollouts in the example and I’ve instrumented in a React project. You should be able to translate the same basic setup to other tools and technologies with a little help doc on whatever tools you decide to use.
Feature flags are interesting because they aren’t just for running experiments. You can use it to gradually roll out new features in a product. You could turn a feature on for 10% of your users and then gradually ramp up to 100% if there are no complaints or bug reports.
Flags are also handy as a kill switch. You can release a new feature and if something goes wrong you remove the update instantly without having to redeploy any changes.
The best bit is that you can take feature management off of a developer’s plate. A product manager can now decide when features go live, and what segments to show them to, without wasting any developer time.
I’m clearly a fan.
I should balance my enthusiasm by pointing out that using feature flags can make software testing complicated. If you have multiple versions of your product in production, keeping any end-to-end testing suites healthy can become messy. It’s not impossible, it’s just something you need to be prepared for.
There are quite a few feature flag managers on the market for under $100. The only one I have used extensively is Optimizely’s rollouts. I have heard great things about LaunchDarkly, but they are slightly above the $100 when you add on the experiment features and I haven’t tried them out yet. I should also point out that Firebase has a remote config feature that lets you do exactly the same things. Some other products in the space that I would like to try out at some point are Split, Config cat, Cloudbees, Flagsmith and Feature flow. I am not affiliated with any of these products in any way. If you know of others that are worth trying out please DM or send them to me on Twitter (@joshpitzalis).
How To Run a Server-Side A/B Test for Web-Apps
You have your product copy changes ready to go. Your developer has added them to the product under a feature flag and hooked up a feature flag manager. You’re almost ready to go.
I say almost because we still need to talk about how you are going to measure the impact of the change.
The broad strokes to running a product experiment are:
- Identifying a customer problem
- Coming up with a hypothesis for a solution
- Adding your changes under a feature flag
- Running the test
- Monitor the performance of the test
Step 5, monitoring performance, doesn’t happen inside your feature flag manager. That typically happens in your product analytics dashboard.
If you don’t have product analytics set up then that’s a separate conversation. Setting up analytics is a complicated topic. Please don’t let that bottleneck your progress though. Rather than building a tracking plan and figuring everything out, you can just install an analytics product called Heap. Heap will automatically track everything for you. This will be good enough to get you started. You only get 60K sessions on their free plan so it’s not a long term solution, but it’s more than enough to get started. Once you have your experiment running, you can invest in developing a proper tracking plan and picking the right tool for your project.
Assuming you have product analytics set up then you will need to connect your feature flag manager to your product analytics tool. Let’s say you’re using Optimzely Rollouts to manage your features and Mixpanel to track product analytics. When a user logs in, Rollouts will send your app information about which experiment they are in. You should take this information and send it to Mixpanel as a profile property for that user. This way you can segment all the users of each variant of the test.
Let’s say your experiment is based on improvements to the onboarding copy. You are measuring success by how many people continue to use the app 30 days after they sign up. Now you can segment users in each variant of the test in Mixpanel to see which version of the app led to more people being retained at 30 days.
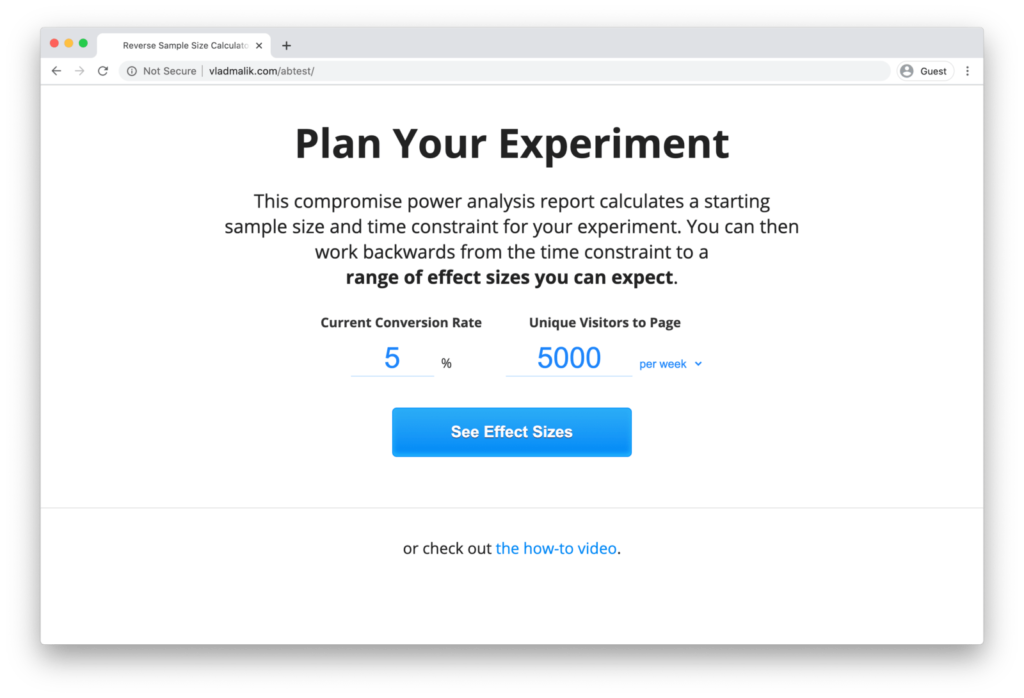
The last step in this process is knowing when to call your test. I will spare you the statistical significance talk and I won’t share any mathematical formulas in this post. Instead, we’re going to use a sample size calculator. I have gone out and tried to find the simplest one I could. The one I landed on is Vlad Malik’s Reverse Sample Size Calculator (there is a link to it in the footer).

There are only two inputs:
- Your current conversion rate. So in the onboarding example above, this would be the percentage of people that continued to use the app 30 days after signing up (within a given timeframe).
- How many new users you currently get each week or month.
Plug the details in and it will tell you how many new users you will need to run a reliable test and how long you need to run the test for.

If you stop your test early you probably haven’t achieved the outcome you think you have.
Imagine you have two dice and you want to check if one is weighted. You roll both dice 10 times. One die seems to be random, the other lands on 3 for more than half of the rolls.
Stop now and you will think one die is heavily weighted. The reality is that 10 rolls is just not enough data for a meaningful conclusion. The chance of false positives is too high with such a small sample size. If you keep rolling, you will see that the dice are both balanced and there is no statistically significant difference between them.
The best way to avoid this problem is to decide on your sample size in advance and wait until the experiment is over before you start believing the results.
So there you have it. How to set up and run an A/B test in a web-based SaaS product without using enterprise testing tools. I specify web-based because mobile apps have their own set of tools, and I haven’t gone down that rabbit hole yet.
This post is the culmination of a six-week-long learning resolution to learn more about UX writing. I thought testing copy changes in my product was going to be easy, none of the courses and books I read touched on the enormous complexity involved in running a simple server-side test. I hope this post helps the next person by setting a more realistic expectation on what to expect and what tools to reach for at each stage.
References
- You can find Vlad’s reverse sample size calculator here http://vladmalik.com/abtest/
- If you need help deciphering what a lot of the other information on the calculator’s results page means I explain it here https://blog.joshpitzalis.com/duration
- If you want to read into feature flags the best place to start is with Martin Fowler’s masterpiece on the topic https://martinfowler.com/articles/feature-toggles.html
- Also, I claimed that Firebase’s remote config feature can be used as a feature flag. Here is a tutorial on exactly how to do that https://firebase.google.com/docs/remote-config/use-cases
Where To Learn More
Interested in learning how to run A/B tests and design with data? CEO of Syntagm William Hudson’s online, self-paced course on Data-Driven Design: Quantitative Research for UX is the perfect place for you to learn:
- How to understand user behavior at scale using quantitative research methods.
- Quantitative methods in detail, including surveys, early-design testing, web/app analytics and A/B testing.
- How to recruit and screen participants.
- Simple statistical analysis to make sense of the data you collect.
To learn about user research methods in general, consider taking the course on User Research – Methods and Best Practices.
